Pen Turning
There's nothing that brings a smile to someone's face quite like a hand-written letter. Custom pens are a beautiful, tactile reminder of where we come from and are more popular than ever! Once you understand the basics of turning, pens are easy and fun to create. These little custom pieces make great gifts for anyone, and are definitely easier to make than custom furniture!
All you need to get started with pen turning is a lathe, some wood, and a pen kit. This is a great project for a beginner or anyone with basic wood-turning skills.
Getting Started
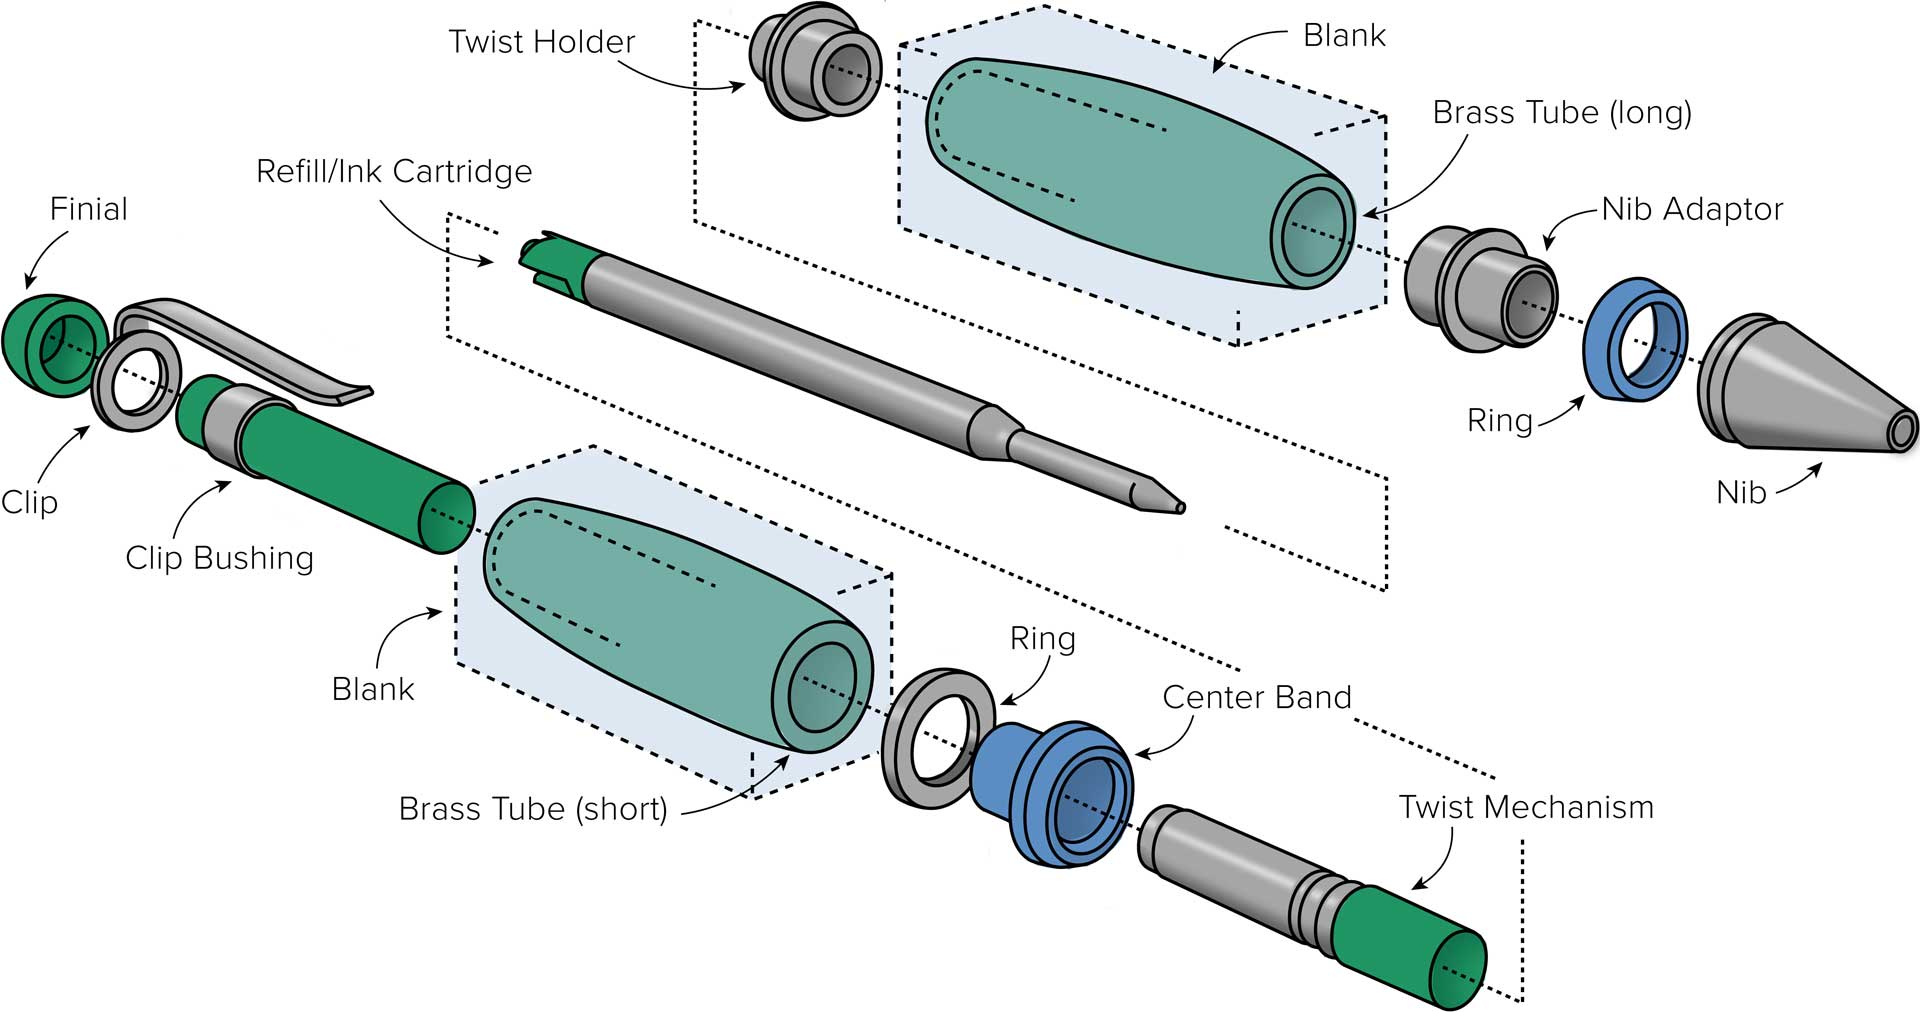
As you can see, pen turning basically involves turning a cylinder. The body, consists of one or two blanks, which are bored and fitted with a brass cylinder. This is then mounted to a lathe, turned, finished, and finally...assembled. Each pen kit is a different and can vary a little or a lot from what we show here. However each kit should have some instructions included. These will show you exact assembly.Tools Needed
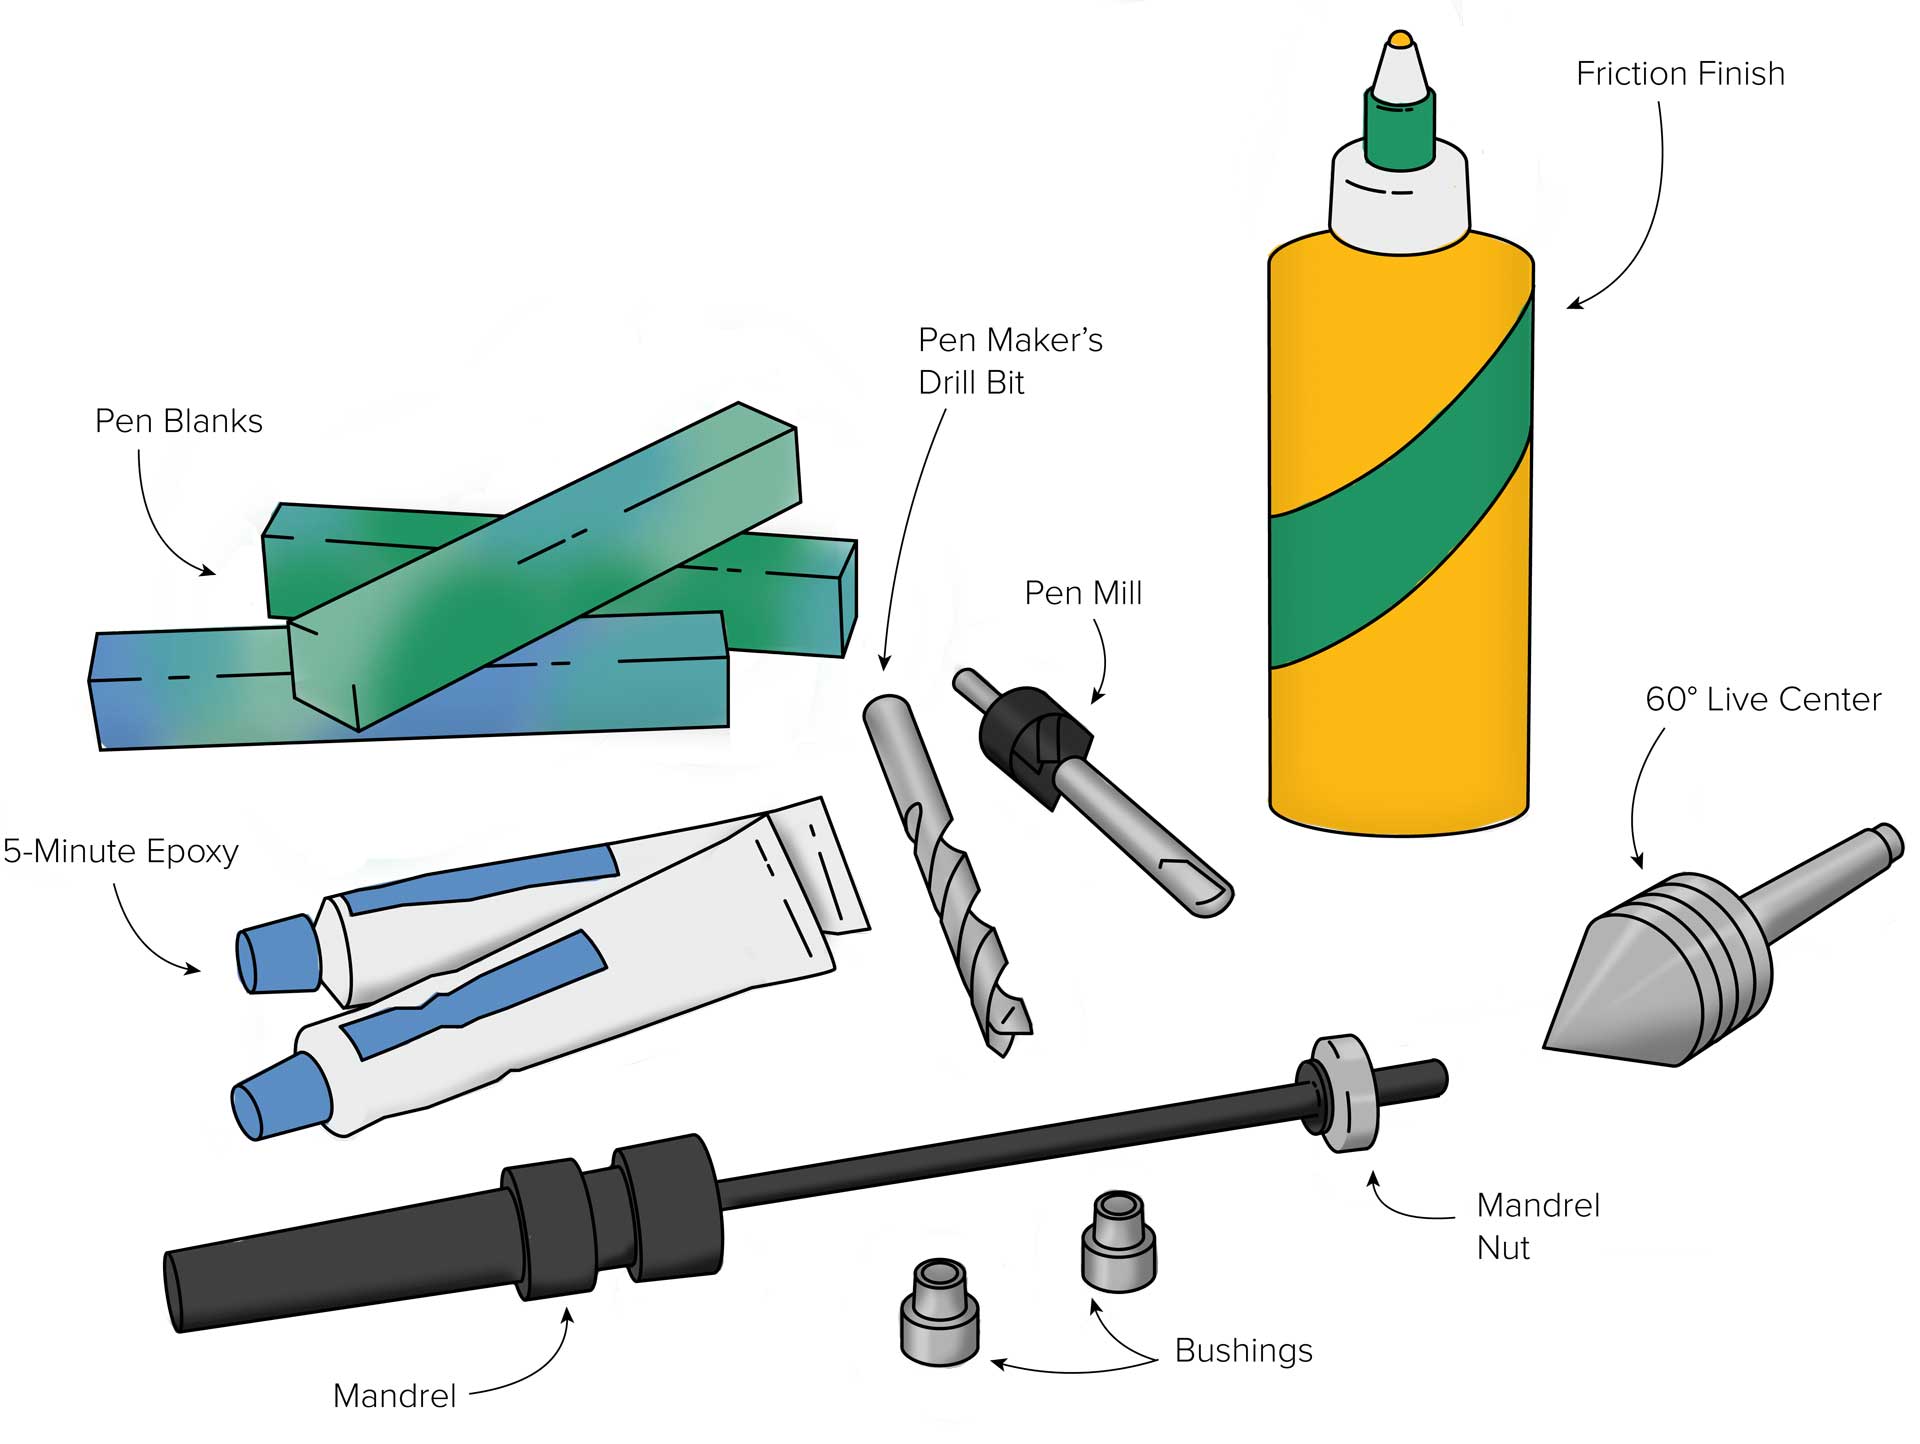
We could dedicate a catalog to all of the different things you can use in pen turning, but we decided to simplify as much as possible! There are many different things you can find for pen turning, but it really is quick, easy, and inexpensive to get started. Compare your tool box with the start-up kit below. Most of these items need no introduction, and you may already have them around from other projects! Also read on to see some deeper explanation on some of the more specialty items.- Pen BlanksYou can buy ready-made blanks, or saw your own. Advanced turners can make pens out of plastic, metal, and even bone, but when starting out, stick with less-exotic woods that are stable and easier to work, such as cherry, maple, or walnut.
- Drill BitsThe blanks must be drilled to fit the kit. You can use a good brad-point bit, but pen maker’s bits are ground to drill straight, deep holes without clogging. Make sure your bit matches your pen kit. (For the Cigar pen, you’ll need a 10mm bit.)
- EpoxyYou’ll need a sure-fire means of attaching the brass to the blank. Epoxy isn’t as quick-setting as cyanoacrylate glue (CA), but until you master the art of fitting the tube, you will appreciate a few extra minutes of working time.
- Pen MillThis two-part cutter helps ensure easy-to-assemble barrels and gap-free pens. The shaft slides into the brass tube and cleans the barrel while the trimmer head squares the ends for perfect-fitting parts. (For the Cigar pen, you’ll need a trimmer with a 10mm shaft.)
- Mandrel and Live CenterThese two items partner up to secure the blank to your lathe. Insert the mandrel into the headstock, slide the bushings and blank on the shaft, and then secure the assembly with the mandrel nut. The rod’s free end is dimpled to fit the live center at the tailstock. Mandrels and live centers are available with #1 and #2 Morse tapers. Buy the size that fits your lathe.
- BushingsThese metal rings are mounted on either end of your blank to provide an indication of when to stop turning. (For this project, you need bushing set #147161, $4.29.)
- Friction FinishFinish your blank before it leaves the lathe. To create a glass-smooth finish, simply apply, let dry, and then buff.